
Can you dry a wet baseball glove quickly? Yes, you can dry a wet baseball glove fast by using a few key techniques, but it’s crucial to avoid methods that can damage the leather. This guide provides essential tips and a step-by-step approach to ensure your prized possession is ready for the next game, prioritizing the long-term health of your baseball glove care.
A wet leather glove requires immediate attention to prevent damage. Whether it was an unexpected downpour, an enthusiastic water fight, or simply an accident, getting water into your glove can be a headache. But don’t despair! With the right approach, you can effectively dry your baseball glove and maintain its performance. This detailed guide will walk you through the best practices for drying baseball glove equipment, from initial steps to final conditioning.
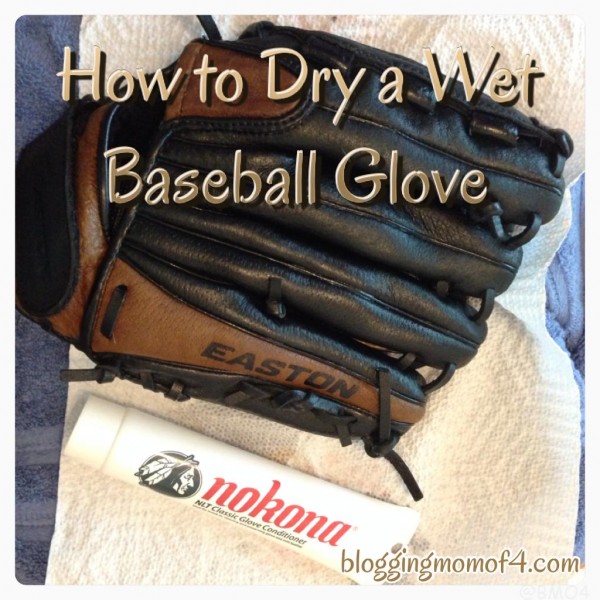
Image Source: bloggingmomof4.com
Why Drying Your Baseball Glove Matters
Leather is a natural material, and water is its enemy if not handled properly. When a wet leather glove is left damp for too long, several issues can arise:
- Stiffening and Cracking: Water can strip away natural oils in the leather, making it brittle and prone to cracking, especially in high-flex areas like the pocket and fingers.
- Mold and Mildew: Damp, dark environments are perfect breeding grounds for mold and mildew. These can not only damage the leather but also create unpleasant odors and potential health issues.
- Loss of Shape: A soaked glove can lose its form, impacting its feel and function.
- Stains and Discoloration: Water can sometimes cause staining or uneven discoloration of the leather.
Proper baseball glove care ensures your glove remains supple, retains its shape, and offers optimal protection and feel for years to come.
Immediate Steps for a Wet Baseball Glove
When you discover your glove is wet, act fast. Here’s what to do right away:
- Remove Excess Water: Gently wipe down the exterior of the glove with a clean, dry, absorbent towel. Don’t wring or twist the glove, as this can warp its shape.
- Open the Glove: Spread the glove open as much as possible to allow air to circulate freely within it.
The Best Methods for Drying a Baseball Glove
The key to drying baseball glove equipment is to do so gradually and evenly, mimicking natural drying without heat.
H3: Air Drying: The Safest Method
Air drying is the most recommended and safest method. It’s gentle on the leather and prevents the rapid changes that can cause damage.
H4: Using Absorbent Materials
This is your primary tool for drawing moisture out of the glove.
- Newspaper: Crumpled newspaper is excellent at absorbing moisture. Stuff the glove as full as you can with loosely crumpled newspaper. Ensure the newspaper is in contact with all inner surfaces.
- Paper Towels: Similar to newspaper, paper towels can also be used. They are often more readily available.
- Rice (Uncooked): Uncooked rice is another effective desiccant, meaning it absorbs moisture. Place the glove in a sealed container or bag with a generous amount of uncooked rice.
Important Note: Change the absorbent material frequently. As it becomes damp, replace it with fresh, dry material. This is crucial for efficient drying. You might need to do this several times over the drying period.
H4: Positioning for Optimal Airflow
- Open Position: Keep the glove in its most open state. You can even use a glove clamp or a sturdy, rounded object (like a small ball or a rolled-up towel) to hold it open.
- Fan Assistance: Place the glove in front of a gently oscillating fan. This will significantly speed up the evaporation process without introducing harmful heat. Position the fan on a low to medium setting.
H4: Finding the Right Location
- Well-Ventilated Area: Choose a dry, well-ventilated room. Avoid humid areas like bathrooms or basements.
- Away from Direct Sunlight and Heat: Never place your glove in direct sunlight or near a heat source like a radiator, heater, or oven. This can dry out the leather too quickly, leading to cracking.
H3: The “Glove Bag” Method
This method utilizes a sealed environment with a desiccant to draw out moisture.
- Gather Your Supplies: You’ll need a large plastic bag or container, and plenty of uncooked rice or silica gel packets (often found in new shoe boxes or electronics packaging).
- Prepare the Glove: Ensure the glove is free of excess surface water.
- Pack the Desiccant: Place a generous amount of uncooked rice or silica gel packets at the bottom of the bag/container.
- Insert the Glove: Place the opened glove on top of the desiccant. If using rice, you can also gently fill the pocket and glove with rice, ensuring not to pack it too tightly.
- Seal It Up: Close the bag or container tightly to create a dry environment.
- Monitor and Replace: Check the glove periodically (every few hours). If using rice, you’ll see it clumping as it absorbs moisture. Replace the rice with fresh, dry rice when it becomes damp. If using silica gel, you can often “recharge” them by drying them out in a low oven or in sunlight.
This method is particularly effective for thoroughly drying the inside of the glove.
What NOT to Do When Drying a Baseball Glove
Certain “quick fix” methods can seem appealing but will ultimately harm your glove.
- Do NOT Use a Hair Dryer: The concentrated heat from a hair dryer will quickly dry out and damage the leather, making it brittle and prone to cracking.
- Do NOT Use an Oven or Microwave: These appliances provide excessive and uneven heat, which will ruin your glove.
- Do NOT Place it in Direct Sunlight: While sunlight can dry things, it also dries out leather too quickly and can fade colors.
- Do NOT Submerge in Water: If the glove is only slightly damp, avoid washing it. If it’s heavily soiled, spot cleaning is better.
- Do NOT Wring or Twist: This will distort the glove’s shape and damage the lacing.
Reconditioning Your Glove After Drying
Once your glove is completely dry, it’s essential to recondition it to restore its suppleness and protect the leather. Drying, even by the best methods, can remove some of the natural oils.
H3: The Importance of Oiling and Conditioning
Oiling a baseball glove and using a baseball glove conditioner are vital steps in restoring moisture and flexibility to the leather. This helps prevent cracking and keeps the glove feeling good in your hand.
H4: Choosing the Right Product
- Glove Oil/Conditioner: Use products specifically designed for baseball gloves. Common ingredients include lanolin, mineral oil, and beeswax.
- Avoid Petroleum Jelly or Cooking Oils: These can be too heavy, clog the leather pores, and become sticky, attracting dirt.
H4: Application Process
- Clean the Glove: Before conditioning, give the glove a light wipe-down with a slightly damp cloth to remove any dust.
- Apply Sparingly: Apply a small amount of glove oil or conditioner to a clean, soft cloth.
- Work it In: Gently rub the conditioner into the leather in a circular motion. Pay attention to areas that feel particularly dry or stiff. Avoid applying too much, as this can make the glove heavy and greasy.
- Allow Absorption: Let the glove sit for a few hours or overnight to allow the conditioner to penetrate the leather.
- Wipe Away Excess: Use a clean cloth to wipe off any excess conditioner.
- Break-in (if needed): After conditioning, you might need to do some light breaking-in to restore the glove’s feel and shape.
H3: What About Baseball Glove Repair?
If your glove has suffered damage beyond just being wet, such as tears in the leather or broken lacing, drying and conditioning are just the first steps. You might need to consider baseball glove repair. Small tears can sometimes be mended with leather glue, while relacing might be necessary for broken laces. For significant damage, professional repair services are available.
Preventing Future Wet Glove Situations
Proactive measures are always better than reactive ones.
H3: Proper Baseball Glove Storage
- Dry Location: Always store your glove in a dry, cool place. Avoid damp garages, sheds, or the trunk of your car during humid weather.
- Ventilation: Don’t store it in a plastic bag for extended periods. A breathable glove bag or simply leaving it out in a dry space is preferable.
- Keep it Open: Store the glove in its open position, perhaps with a ball in the pocket to maintain its shape.
H3: Protecting Your Glove During Games
- Rain Gear: If playing in wet conditions, consider bringing a towel and a plastic bag to store your glove if it gets wet.
- Avoid Leaving it Out: Don’t leave your glove on the ground or in open equipment bags where it can easily get wet.
H3: Preventing Mildew
Preventing mildew is a crucial part of baseball glove care.
- Ensure Dryness: The best way to prevent mildew is to ensure your glove is thoroughly dry after any exposure to moisture.
- Good Airflow: When storing, ensure there’s good airflow around the glove.
- Occasional Inspection: Periodically check your glove for any signs of mold or mildew, especially if you live in a humid climate. A light cleaning with a leather cleaner can help if any is detected.
Troubleshooting Common Glove Drying Issues
| Problem | Cause | Solution |
|---|---|---|
| Glove still feels damp inside | Insufficient drying time or absorbent material | Continue using fresh absorbent materials, fan drying, or the glove bag method. Ensure thoroughness. |
| Leather feels stiff | Natural oils stripped during drying | Recondition thoroughly with a good quality baseball glove conditioner. Gently flex the glove after conditioning. |
| Glove smells musty/moldy | Mold or mildew growth | Dry the glove completely. Clean with a leather cleaner. Apply a conditioner containing anti-mildew properties. Consider a specialized glove deodorizer. |
| Glove has lost its shape | Over-wetting and improper drying/storage | Try to reshape manually. Use a glove clamp or a ball to help maintain form during drying and storage. Professional reshaping might be needed. |
Frequently Asked Questions (FAQ)
Q1: How long does it typically take to dry a wet baseball glove?
The time can vary greatly depending on how wet the glove is and the drying method used. However, it can take anywhere from 24 to 72 hours of consistent drying with absorbent materials and airflow. Patience is key.
Q2: Can I use baby powder to dry my baseball glove?
While baby powder can absorb some moisture, it’s not ideal for leather glove maintenance. It can build up in the leather pores and potentially clog them, affecting the feel and breathability of the glove. Stick to newspaper, paper towels, or uncooked rice.
Q3: Is it okay to leave a ball in my wet glove?
If the glove is very wet, leaving a ball in it might trap moisture inside and hinder drying. It’s best to remove the ball and stuff the glove with absorbent material to allow for maximum air circulation and moisture absorption.
Q4: How often should I condition my baseball glove?
Generally, you should condition your glove every 2-3 months or whenever the leather feels dry. After a significant wet period and drying, conditioning is especially important. Over-conditioning can also be detrimental, making the glove too soft or heavy.
Q5: What are the signs my baseball glove needs repair?
Look for cracked leather, fraying or broken lacing, and holes in the webbing or pocket. Addressing these issues promptly can prevent further damage and extend the life of your glove. Regular inspection is part of good baseball glove care.
Q6: Can I use saddle soap on my baseball glove?
Saddle soap is designed for cleaning and conditioning leather goods, including saddles and boots. While it can be effective for cleaning, some players find it can make a baseball glove slightly too soft or change its feel. If you choose to use it, always test on an inconspicuous area first and follow up with a dedicated baseball glove conditioner.
By following these guidelines, you can ensure your wet baseball glove is dried properly and remains in top condition for many seasons to come, a testament to diligent baseball glove care.