
Can you break in a baseball mitt fast? Yes, you absolutely can, and this guide will show you how. Breaking in a new baseball glove or a pre-owned glove softening can seem like a daunting task, but with the right techniques, you can achieve optimal performance and a comfortable fit in no time. We’ll cover everything from softening leather to the best glove treatment and preparation methods to get your mitt game-ready.
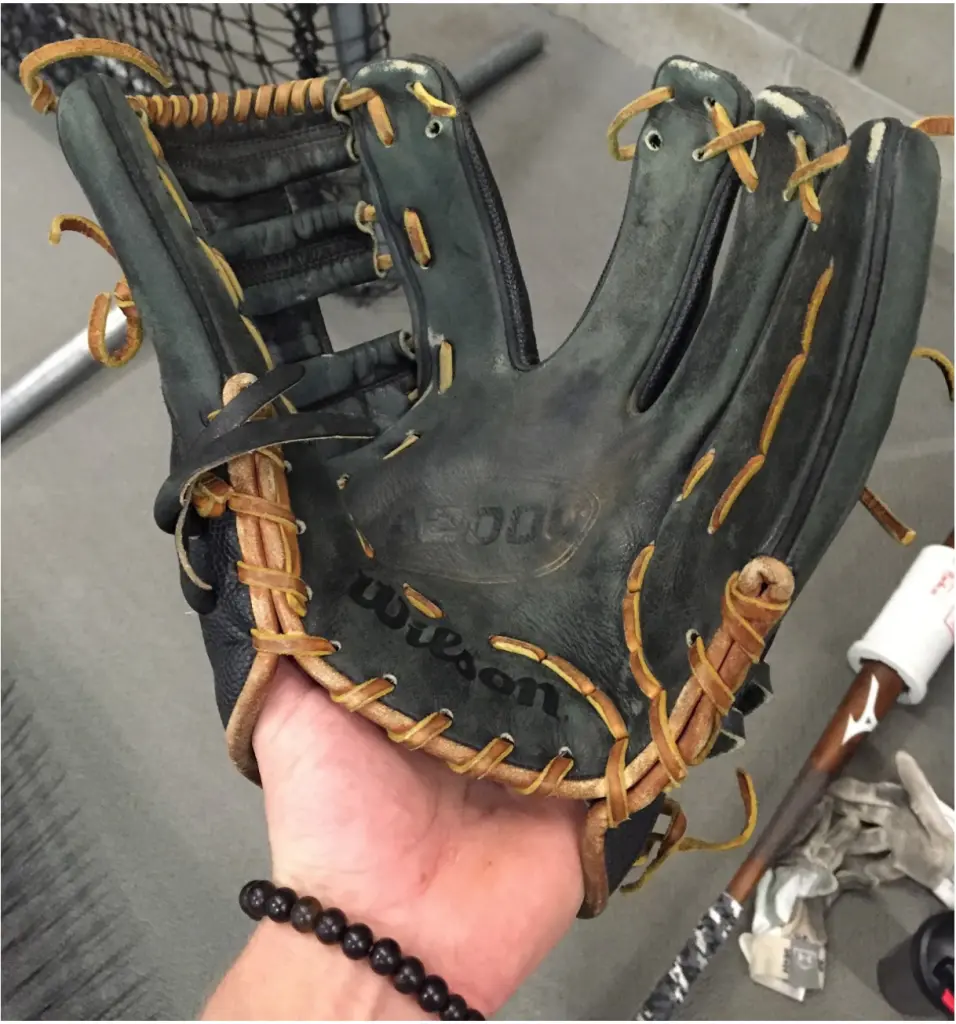
Image Source: thehittingvault.com
Why is Proper Glove Break-In Important?
A well-broken-in baseball glove isn’t just about comfort; it’s about performance. A stiff, unyielding mitt can hinder your ability to catch the ball cleanly, affecting your fielding. A proper break-in process allows the leather to mold to your hand, creating a natural pocket formation and ensuring a secure grip. This not only makes catching easier but also protects your hand from the impact of the ball. Think of it as making the glove an extension of your own hand.
Benefits of a Broken-In Glove:
- Improved Catching: A softer, more pliable glove makes it easier to control the ball.
- Enhanced Grip: The leather conforms to your hand, providing a better feel and grip on the ball.
- Reduced Sting: A well-broken-in pocket absorbs more impact, reducing hand sting.
- Increased Durability: Proper conditioning can prolong the life of your glove.
- Better Control: A glove that fits well and is pliable offers greater control over fielding actions.
The Fastest Methods to Break In a Baseball Glove
When you need to break in a baseball glove fast, several effective methods exist. These aren’t about shortcuts that damage the leather, but rather efficient ways to accelerate the natural process. We’ll explore various glove break in methods that are both effective and safe for your equipment.
1. The “Play Catch” Method: The Classic Approach
This is the most traditional and often the most recommended method. It involves simply using the glove as it was intended: to catch baseballs. The repeated impact of the ball on the leather helps to soften and shape the glove naturally.
How to do it:
- Frequency is Key: The more you play catch, the faster the break-in. Aim for at least 15-30 minutes daily.
- Target the Pocket: Consciously try to catch the ball in the deepest part of the pocket. This will help it form correctly.
- Vary Your Throws: Have a partner throw a variety of speeds and types of pitches to different parts of the glove. This flexes the leather in all directions.
Pros:
- Gentle on the leather.
- Promotes natural pocket formation.
- Builds muscle memory for fielding.
Cons:
- Can be time-consuming, especially for very stiff gloves.
- Requires a partner or willing thrower.
2. The “Glove Mallet” or “Baseball Bat” Method: Targeted Shaping
Using a glove mallet (or even a clean baseball bat) can speed up the process by applying focused pressure to specific areas of the glove. This helps to soften stubborn creases and mold the leather into the desired shape.
How to do it:
- Identify Key Areas: Focus on the areas where the pocket will form and along the hinge of the glove.
- Gentle but Firm: Strike the glove with the mallet or bat, but avoid hitting it so hard that you damage the stitching or the leather itself.
- Work in Sections: Gradually work your way around the glove, spending time on different areas.
- Combine with Other Methods: After using a mallet, put a ball in the pocket and wrap the glove to maintain the shape.
Pros:
- Effective for softening specific stiff areas.
- Helps create a deeper pocket.
Cons:
- Risk of over-beating and damaging the glove if not done carefully.
- Requires a specific tool or improvised object.
3. The “Stuff and Wrap” Method: Continuous Pressure
This method involves placing a baseball or several soft balls into the pocket of the glove, then wrapping it tightly with rubber bands, string, or a specialized glove wrap. The constant pressure helps to mold the glove into a more closed position, encouraging pocket formation.
How to do it:
- Ball Placement: Place one or two balls squarely in the pocket.
- Secure Wrapping: Wrap the glove firmly. Ensure the laces are not overly strained.
- Overnight or Longer: Leave the glove wrapped for at least 24-48 hours. You can repeat this process several times.
Pros:
- Applies consistent pressure for shaping.
- Can be done overnight, saving active break-in time.
- Good for maintaining shape after other methods.
Cons:
- Can flatten the pocket if done incorrectly or with too many balls.
- May not soften the leather as much as other methods on its own.
4. The “Glove Oil/Conditioner” Method: Softening the Leather
Applying specialized glove oil or conditioner is crucial for softening leather. This process lubricates the fibers, making them more pliable and easier to shape. However, over-oiling can make the glove too heavy and greasy, so moderation is key.
How to do it:
- Choose the Right Product: Use products specifically designed for baseball glove leather. Avoid general leather conditioners.
- Apply Sparingly: Apply a thin, even coat to the inside and outside of the glove, paying special attention to the pocket and fingers.
- Work It In: Gently massage the oil into the leather with your hands or a soft cloth.
- Allow Absorption: Let the glove sit for a few hours or overnight to absorb the oil.
- Wipe Excess: Always wipe away any excess oil.
Pros:
- Crucial for softening leather and making it pliable.
- Helps protect the leather from drying out.
Cons:
- Over-oiling can lead to a heavy, greasy glove.
- Some oils can darken the leather significantly.
Glove Oil/Conditioner Recommendations:
| Product Name | Key Features | Best For |
|---|---|---|
| Glove Lube | All-purpose conditioning and softening | General break-in and maintenance |
| Rawhide Mallet Oil | Specifically formulated for mallet conditioning | Deep softening and shaping |
| Natural Leather Preserver | Pure lanolin-based, very gentle | Vintage gloves or sensitive leather |
| Saddle Soap | Cleans and conditions, but can dry leather if overused | Light cleaning and conditioning |
5. The “Steaming” Method: Rapid Softening (Use with Caution!)
Steaming a baseball mitt is one of the fastest ways to soften leather. The heat and moisture relax the leather fibers, making them incredibly pliable. However, this method carries the highest risk of damage if not done correctly. Over-steaming can damage the leather, loosen stitching, or even cause the glove to lose its shape permanently.
How to do it:
- Prepare Your Station: You’ll need a pot of boiling water and a way to suspend the glove over the steam without it touching the water directly. A pot with a steamer basket or a colander works well.
- Controlled Exposure: Hold the glove over the steam for no more than 60-90 seconds. You want the leather to feel warm and pliable, not soaking wet.
- Work Immediately: As soon as you remove the glove from the steam, work it manually. Flex the pocket, bend the fingers, and insert a ball.
- Wrap and Shape: Wrap the glove tightly with a ball in the pocket, just like the “Stuff and Wrap” method, to maintain the newly formed shape.
- Repeat if Necessary (Cautiously): If the glove is still too stiff, you can repeat the steaming process, but wait at least 24 hours and do so cautiously.
Pros:
- Extremely fast softening of leather.
- Can quickly make a glove playable.
Cons:
- High risk of damaging the leather (over-drying, cracking).
- Risk of loosening stitching.
- Can permanently alter the glove’s shape if not done carefully.
- Should only be used as a last resort and with extreme caution.
6. The “Oven” Method: Another Fast but Risky Option
Similar to steaming, the oven method uses heat to soften leather. Again, this is a high-risk, high-reward technique that requires extreme care.
How to do it:
- Preheat Oven: Set your oven to its lowest possible temperature (around 150-200°F or 65-93°C). Never use a higher temperature.
- Place Glove: Place the glove on a baking sheet or directly on the oven rack for a very short period, typically 5-10 minutes.
- Monitor Closely: Watch it constantly. The goal is to warm the leather, not cook it.
- Work Immediately: Remove the glove from the oven while it’s still warm and pliable. Work it manually, form the pocket, and insert a ball.
- Wrap and Shape: Wrap the glove tightly with a ball in the pocket to hold the shape.
Pros:
- Can quickly soften stiff leather.
Cons:
- Very high risk of drying out, cracking, or even melting the leather.
- Can damage stitching.
- Requires constant vigilance.
Important Note on Heat Methods (Steaming/Oven): These methods are intended for situations where speed is absolutely paramount. If you have the time, it is always best to rely on gentler methods like playing catch, oiling, and wrapping. Always test a small, inconspicuous area of the glove first if you’re unsure.
The “Pre-Owned Glove Softening” Technique
Buying a used glove can be a great way to save money, but often these gloves are still quite stiff. The process for pre-owned glove softening is similar to breaking in a new glove, but you might need to focus more on rehydrating and reconditioning the leather.
Key Steps for Pre-Owned Gloves:
- Clean Thoroughly: Use a damp cloth to wipe away any dirt or grime. For tougher grime, a mild saddle soap can be used, but ensure you follow up with conditioning.
- Assess Leather Condition: Check for any signs of dryness, cracking, or excessive wear.
- Condition and Soften: Apply a quality glove oil or conditioner generously. This is where you can be a bit more liberal than with a brand-new glove, as it often needs more rehydration.
- Work the Leather: Manually flex and bend the glove to redistribute the oil and soften the fibers.
- Pocket Formation: Place a ball in the pocket and wrap the glove. Let it sit for a day or two, then repeat.
- Play Catch: The best way to finish is by playing catch to fully mold it to your hand.
Essential Glove Treatment and Glove Preparation
Beyond just softening, proper glove treatment and glove preparation ensure your mitt remains in excellent condition. This involves regular maintenance and using the right products.
Conditioning Your Glove: The Foundation of Longevity
Regular conditioning is vital to keep your glove supple and prevent it from drying out and cracking.
- Frequency: Condition your glove every few months, or whenever the leather looks dry.
- Application: Apply a thin layer of glove oil or conditioner using a soft cloth.
- Focus Areas: Pay attention to the pocket, finger stalls, and the web.
- Wipe Excess: Always remove any excess oil.
Protecting Your Glove: Beyond Break-In
- Storage: Store your glove in a cool, dry place, away from direct sunlight. Avoid leaving it in extreme heat (like a car trunk in summer).
- Avoid Over-Oiling: Too much oil can make the glove heavy and prone to losing its shape.
- Cleaning: Regularly wipe down your glove with a dry or slightly damp cloth to remove dirt.
Advanced Glove Break-In Strategies
Once you’ve mastered the basics, consider these more nuanced approaches to glove break-in.
The “Dual Approach”: Combining Methods for Speed and Quality
Often, the fastest and most effective glove break in methods involve combining techniques.
- Example 1: Apply glove oil, let it soak in, then use a mallet to work the pocket, and finally, wrap it with a ball overnight.
- Example 2: Play catch for a week, then use a steamer briefly for stubborn areas, followed by wrapping.
Pocket Formation: The Art of the Sweet Spot
The pocket is where the magic happens. A well-formed pocket ensures secure catches and quick transfers.
- Targeted Pressure: When using mallets or even your fist, focus pressure on the center of the pocket area.
- “Finger Roll”: Many players find success by rolling their fingers firmly along the inside of the pocket to create a deeper groove.
- Lacing Techniques: Some players loosen or tighten specific laces to adjust the glove’s closure and pocket depth. This is a more advanced technique and should be done with care.
Glove Preparation for Specific Positions
The ideal break-in process can vary slightly depending on the player’s position.
- Infielders: Often prefer a shallower, more responsive pocket for quick transfers. Methods that encourage a flatter pocket might be favored.
- Outfielders: Typically need a deeper pocket to secure fly balls. Techniques that emphasize closing the glove and deepening the pocket are beneficial.
- Catchers: Catcher’s mitts are unique and require a specific break-in to create a deep, flexible pocket that can absorb high-speed pitches. This often involves more intense mallet work and prolonged wrapping.
Frequently Asked Questions (FAQ)
What is the fastest way to break in a baseball glove?
The fastest methods involve using heat (steaming or oven, with extreme caution) combined with manual shaping and wrapping with a ball. However, these methods carry risks. Playing catch consistently is the safest and often most effective method over time.
Can I use WD-40 to break in a baseball glove?
No, WD-40 is not recommended for baseball gloves. It can dry out and damage the leather over time, making it brittle. Stick to products specifically designed for conditioning and softening leather gloves.
How long does it take to break in a baseball glove?
This varies greatly depending on the glove’s leather quality, stiffness, and the methods used. It can take anywhere from a few days (with rapid methods) to several weeks or even months of regular use.
Should I oil my baseball glove before the first use?
It’s generally a good idea to apply a light coat of glove oil or conditioner to a new glove before its first use. This helps to rehydrate the leather and begin the softening process gently.
How often should I condition my baseball glove?
Condition your glove every few months, or whenever the leather appears dry. More frequent use in harsh conditions may require more frequent conditioning.
Can I put my baseball glove in the washing machine?
Absolutely not. The washing machine will ruin your glove by damaging the leather, stitching, and overall structure. Always clean your glove by hand.
What if my glove is too stiff after breaking it in?
If your glove is still too stiff, you may need to repeat some of the softening methods, such as applying more oil, using a mallet gently, or re-wrapping it with a ball. If you used heat methods, allow the glove to rest for a day before attempting any further treatment.
How do I form a good pocket in my baseball glove?
A good pocket is formed by consistent use, targeted pressure on the center of the glove’s palm, and using the “stuff and wrap” method with a baseball in the pocket. Playing catch and ensuring the ball lands in the same spot each time will naturally create a pocket.
Breaking in a baseball mitt is a rite of passage for any player. By employing these expert tips, you can expedite the process while ensuring your glove becomes a reliable extension of your game. Remember to be patient, use the right tools and products, and always prioritize the long-term health of your glove. Happy fielding!