
Image Source: i.ytimg.com
How to Break in a Baseball Glove in the Oven Fast
Can you break in a baseball glove in the oven fast? Yes, the baseball glove oven method is a popular technique for quickly softening and shaping a new glove. This article will guide you through the process of how to break in a baseball glove in the oven, detailing the steps, necessary materials, and important considerations for a successful oven break in baseball glove experience. We’ll cover how to condition your glove using the oven, including the ideal baseball glove baking time, and whether oven proofing baseball glove is a valid approach. This guide is also applicable for a softball glove oven break in.
The Rationale Behind the Oven Glove Method
New baseball and softball gloves are often stiff and rigid. This is primarily due to the tanning and finishing processes applied to the leather. The leather needs to be supple enough to close around a ball and provide a comfortable, secure fit for the player. While traditional methods like oiling, playing catch, and steaming exist, the oven offers a concentrated and faster way to achieve this desired pliability. The heat from the oven helps to relax the leather fibers, making them more receptive to shaping and conditioning.
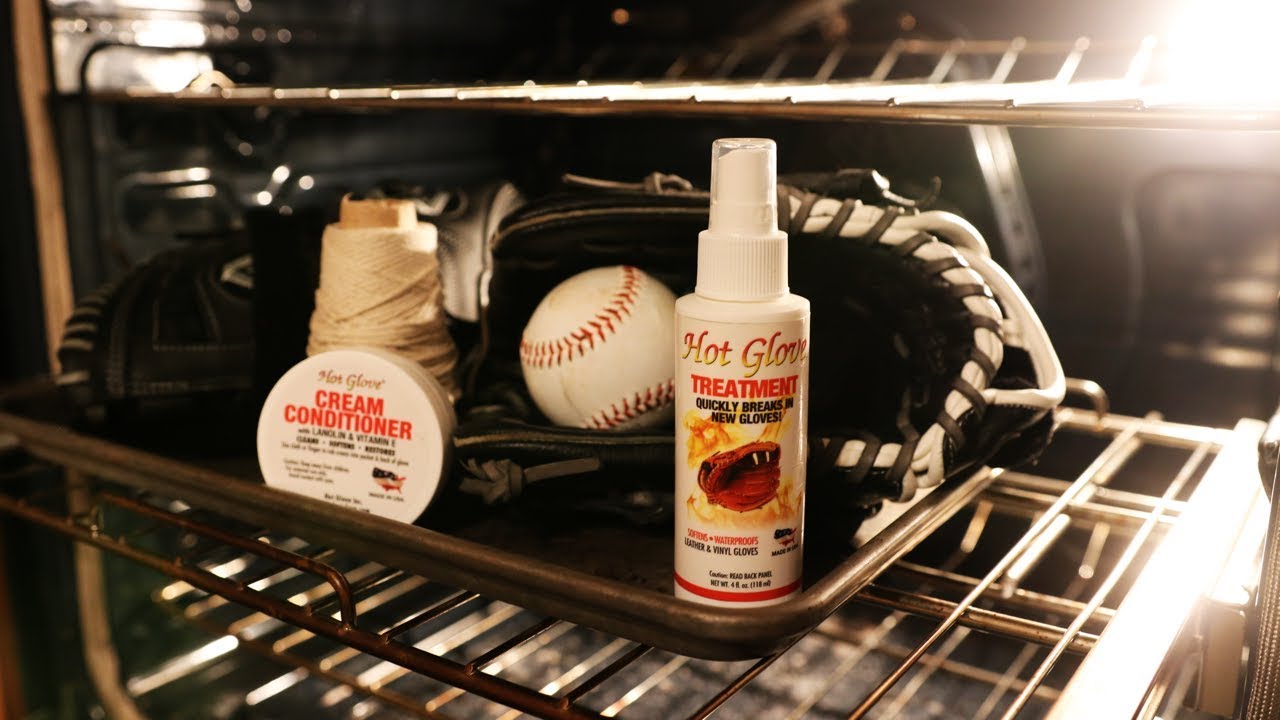
Essential Materials for Oven Glove Conditioning
Before you begin the baseball glove oven method, gather these essential items:
- Your Baseball or Softball Glove: Ensure it’s made of genuine leather. Synthetic materials will not respond well to heat.
- Glove Oil or Conditioner: A specialized leather conditioner designed for baseball gloves is highly recommended. Avoid petroleum jelly or other heavy oils.
- Plastic Wrap: To protect the glove from direct heat and to help seal in moisture and conditioner.
- Rubber Bands or String: For securing the glove in a closed position.
- Oven Mitts: For safe handling of the hot glove.
- A Clean Baking Sheet or Oven Rack: To place the glove on.
Step-by-Step Guide: How to Break In a Baseball Glove in the Oven
Here’s a detailed walkthrough of how to condition glove oven:
Step 1: Prepare the Glove
- Inspect the Glove: Ensure the glove is clean and free of dirt or debris.
- Apply Conditioner: Generously apply your chosen glove oil or conditioner to the inside of the glove, focusing on the palm and finger stalls. Gently work the conditioner into the leather with your hands. Some people also like to condition the outside, but the interior is where you’ll feel the most benefit from the softening.
- Form the Glove: Place a baseball or a balled-up sock into the pocket of the glove. Close the glove around the object, mimicking how you would catch a ball.
- Secure the Shape: Use rubber bands or string to keep the glove in this closed position. This is crucial for achieving the correct pocket shape. Make sure the bands are snug but not so tight that they distort the glove’s natural form.
Step 2: The Oven Process: The Heart of the Baseball Glove Oven Method
This is where the heat break in baseball glove comes into play.
- Preheat the Oven: Set your oven to its lowest possible temperature. This is typically between 170°F and 200°F (77°C to 93°C). Crucially, never exceed 200°F. Higher temperatures can severely damage the leather, making it brittle and prone to cracking.
- Wrap the Glove: Tightly wrap the prepared glove in plastic wrap. This step is vital to prevent the leather from drying out too quickly and to help the conditioner penetrate effectively. Ensure it’s completely covered.
- Bake the Glove: Place the wrapped glove on a baking sheet or directly on the oven rack. The baseball glove baking time is critical. Aim for 15-20 minutes for the first session. It’s always better to start with shorter intervals and check the glove’s progress.
Step 3: Cool Down and Inspect
- Remove from Oven: Using oven mitts, carefully remove the glove from the oven.
- Unwrap and Assess: Unwrap the glove and inspect the leather. It should feel noticeably softer and more pliable. Check the pocket and finger stalls for flexibility.
- Work the Glove: While the glove is still warm (but not hot), flex it, bend it, and work the pocket with your hands. This manual manipulation helps to further break in the leather and reinforce the desired shape. You can also practice catching with it.
Step 4: Repeat if Necessary
- Second Session: If the glove is still too stiff, you can repeat the oven process. For subsequent sessions, you might consider slightly reducing the baseball glove baking time to 10-15 minutes.
- Limit Sessions: It’s generally advised not to repeat the oven method more than 2-3 times. Excessive heat can still degrade the leather over time.
Step 5: Final Conditioning and Shaping
- Remove Bands: Once you’re satisfied with the glove’s flexibility, remove the rubber bands or string.
- Final Oiling: Apply a final, lighter coat of glove oil or conditioner to the entire glove, inside and out.
- Conform to Your Hand: Wear the glove for extended periods, playing catch, and practicing your fielding drills. The more you use it, the better it will conform to your hand and your specific playing style. This is where the oven glove shaping really solidifies.
Important Considerations for the Baseball Glove Oven Method
While effective, the oven break in baseball glove technique requires careful attention to avoid damaging your valuable equipment.
- Leather Type Matters: This method is best suited for genuine leather gloves. Synthetic or composite materials may melt or deform under heat. Always check the manufacturer’s recommendations for your specific glove.
- Temperature is Key: As mentioned, never exceed 200°F. The goal is to gently relax the leather, not to cook it. Too much heat will dry out the leather, making it brittle and prone to cracking. This is why oven proofing baseball glove sounds a bit aggressive; it’s more about gentle conditioning.
- Don’t Overdo It: Multiple short sessions are safer than one long session. Monitor the glove closely during each interval.
- The Smell: Be prepared for a distinct leather smell when you open the oven. Ensure good ventilation.
- Conditioner Choice: Use a high-quality leather conditioner specifically designed for baseball gloves. These conditioners replenish the natural oils in the leather, which heat can deplete.
- Oven Accuracy: Ovens can vary in their temperature accuracy. Using an oven thermometer can help ensure you’re not using excessive heat.
Alternatives to the Oven Method
If you’re hesitant about using the oven, or if your glove is made of a material that might not tolerate heat well, consider these traditional methods for breaking in a glove:
Traditional Play and Practice
- Playing Catch: This is the most natural and often the most effective way to break in a glove. The repeated impact of the ball helps shape the pocket.
- Drills: Incorporate fielding drills into your practice routine. The more you catch, the faster the glove will break in.
Glove Oil and Manual Shaping
- Regular Oiling: Apply glove oil or conditioner periodically and work it into the leather.
- Manual Manipulation: Flex the glove, press down on the pocket, and bend it manually to soften the leather.
Steaming (Use with Extreme Caution)
- Steam Method: Some players use steam from a kettle or a handheld steamer to soften the glove. This requires significant caution as too much steam can damage the leather and stitching.
- Controlled Environment: If attempting to steam, do so in a controlled environment and avoid direct contact of hot steam with the leather for extended periods.
Can You Break in a Softball Glove in the Oven?
Yes, the softball glove oven break in process is identical to that for a baseball glove. The materials and principles are the same. Softball gloves are often made from similar leather types and require the same softening and shaping to perform optimally. The primary difference lies in the size and pocket depth, but the baseball glove oven method remains an effective way to prepare either type of glove for play.
Frequently Asked Questions About Oven Glove Break-In
Q1: How long should I bake a baseball glove in the oven?
A: For the initial session, 15-20 minutes at the lowest oven setting (170-200°F or 77-93°C) is recommended. You can repeat with shorter intervals if needed.
Q2: What temperature should I use for the baseball glove oven method?
A: The absolute lowest setting your oven has, typically between 170°F and 200°F (77°C to 93°C). Never go above 200°F.
Q3: Will the oven method damage my baseball glove?
A: If done correctly, at the proper temperature and for the right duration, the oven method is generally safe for genuine leather gloves. However, exceeding the recommended temperature or baking for too long can dry out, crack, or otherwise damage the leather.
Q4: Can I use any type of oil to condition my glove in the oven?
A: It’s best to use a specialized baseball glove oil or conditioner. Avoid heavy oils, petroleum jelly, or motor oil, as these can clog the leather pores and degrade the material over time.
Q5: How many times can I use the oven to break in my glove?
A: It’s advisable to limit oven sessions to 2-3 times. Excessive heat can still negatively impact the leather’s longevity. Traditional methods are better for ongoing maintenance.
Q6: What if my glove is synthetic?
A: The oven method is not recommended for synthetic or composite gloves. These materials can melt, deform, or become brittle when exposed to heat. Always check the manufacturer’s guidelines.
Q7: Why wrap the glove in plastic wrap?
A: Wrapping the glove in plastic wrap helps to seal in the moisture from the conditioner and prevents the leather from drying out too rapidly from the oven’s heat. It aids in deeper conditioning.
Q8: Is “oven proofing baseball glove” a real technique?
A: While people use the term, it’s more accurately described as gentle conditioning with heat. “Oven proofing” might imply a more extreme or damaging process, which should be avoided. The goal is pliable, not cooked, leather.
Conclusion: The Oven as a Tool, Not a Solution
The baseball glove oven method can be a highly effective shortcut to achieving a game-ready glove. By carefully following these steps and prioritizing the health of your leather, you can significantly speed up the break-in process. Remember that while the oven can initiate the softening and shaping, consistent play and manual conditioning are still vital for long-term glove performance and longevity. Treat the oven as a helpful tool in your glove preparation arsenal, not a magic bullet. With the right approach, you’ll have your new glove feeling like an extension of your hand in no time, ready for every catch and throw.